There are multiple ways to acquire fixed asset in Microsoft dynamics 365 finance and operations.
Some of examples are listed below.
1-From fixed asset journal
2-From Fixed asset Acquisition Proposal
2-From (purchase requisition) PR
3-From (Purchase Order) PO
4- From (Purchase Order) PO Invoice
5- From Non-PO Invoice etc.
Let’s us learn about fixed asset journal acquisition:
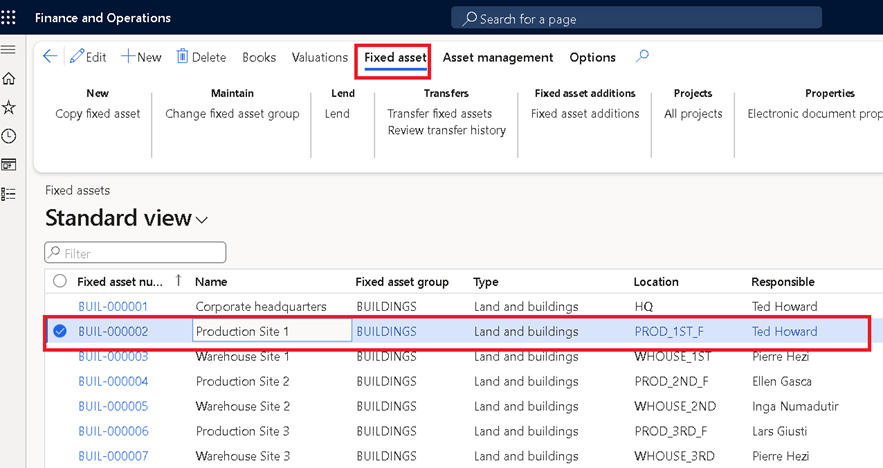
Note: fixed asset record should have been created manually before creating fixed asset journal.
Creation of asset does not have any impact on GL until we begin with acquiring and asset follows the cycle where we cannot depreciate the asset if not followed the acquisition method in system.
Scenerio1: Acquiring as Executive desk account number” FURN_FIX-000005” which for 110.00.
Journal entry: This will post debit amount to asset 110.00 using an credit to offset account.
As primary book 150_SLLR also has derived boon for Tax defined so posting will reflect in same that can be seen from voucher post transaction.
Lab:
Go to Fixed assets > Journal entries > Fixed assets journal.
Click New.
Select the journal type that needs to be used for
In the list, from selected row.
Click Lines.
Verify posting date, journal type and other fields.
In the Account field, specify the Fixed Asset number to be acquired.
In the Debit field, enter amount.
Verify that offset account is defined.
Click Financial dimensions>Account and verify the dimension.
Click OK.
Click Validate.
Click Simulate posting.
Click Post.
Click Voucher to see the accounting entries.
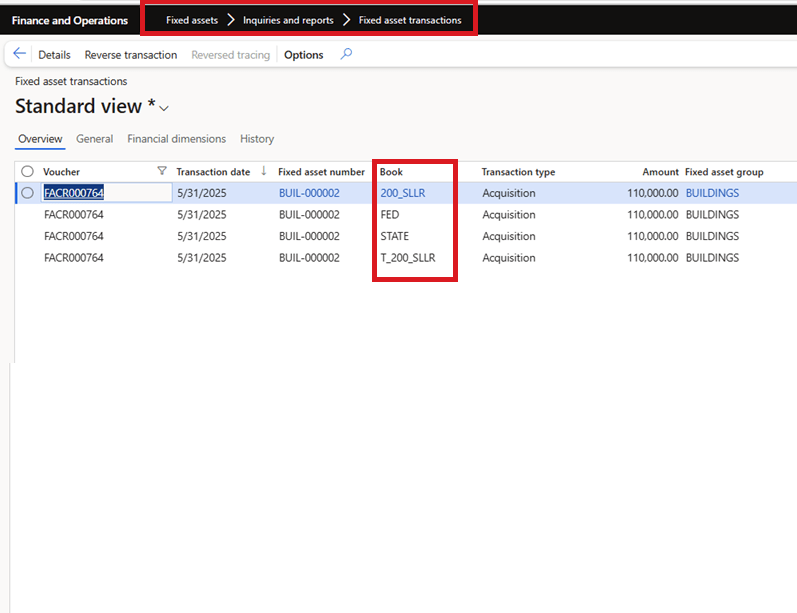
Go to Fixed Asset>inquiries and reports>fixed asset transactions to see all transactions.
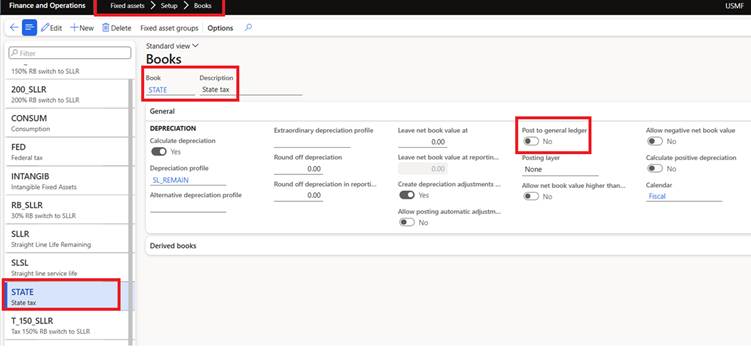
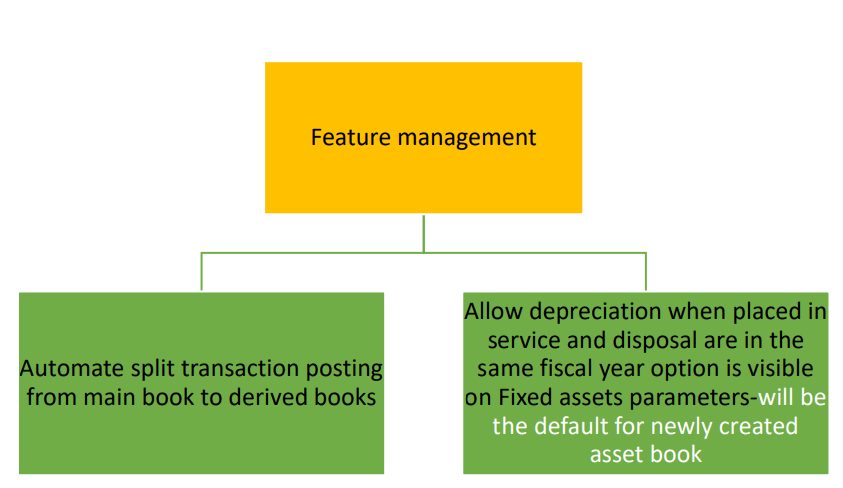
As per law and for regulatory reporting, Companies should maintain more than one book for every fixed asset
That means that any transaction posted like an acquisition or disposal etc. will reflect in those books.
TAX Book: Books setup for Tax reporting with Post to general ledge is disabled and posting layer is None so that no posting happens at G/L level.
These are for TAX reporting purpose only.
Books
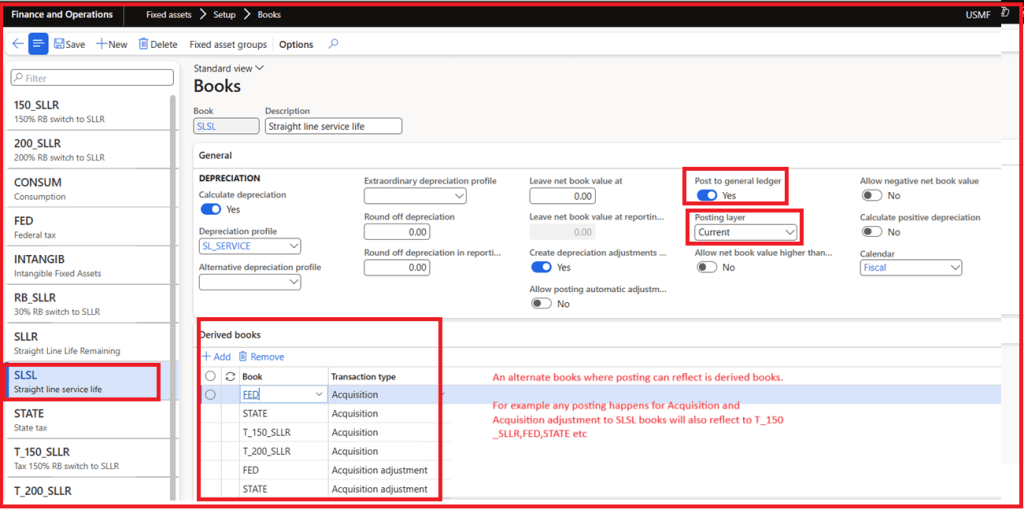
Operations/Current layer book: When we want FA transactions to be recorded in books, enable Post to general ledger and select the layer as needed like current or operation.
Books
Any posting done using this book SLSL will also post transactions to derived books.
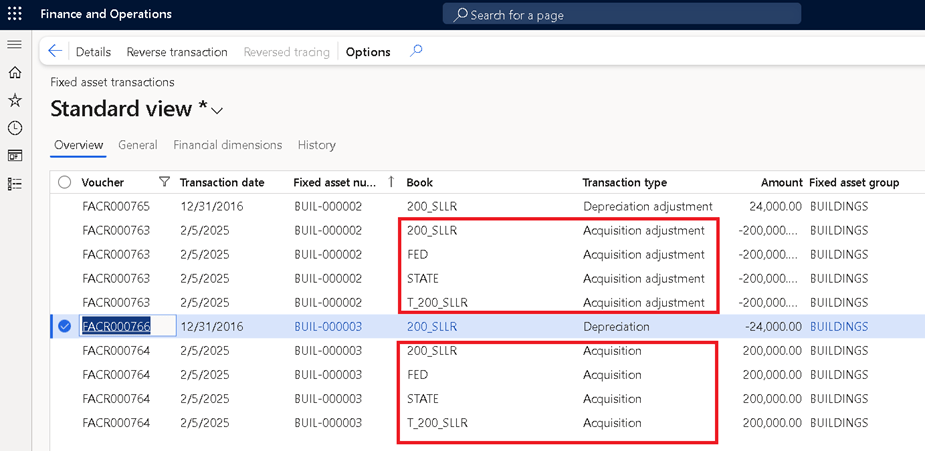
Now post journal to see the transactions.
Fixed Asset Journal
Verify the transactions in inquiries and reports to see posting impacted to multiple books because of derived books linkage.
Fixed Asset transactionsSummary: Entry posted to primary books will also reflect in derived books if it is selected like we did posting using 200_SLLR but transactions are appearing at other derived books like FED, STATE and T_200_SLLR.
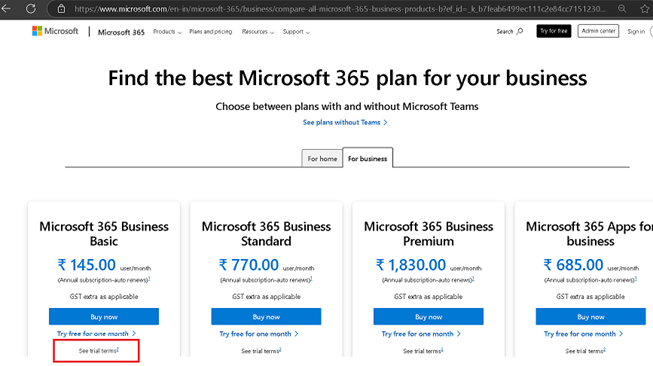
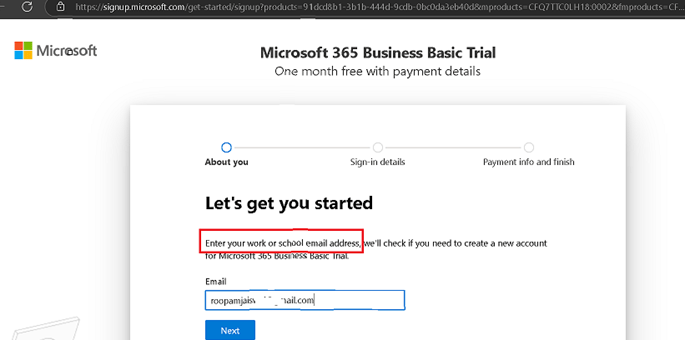
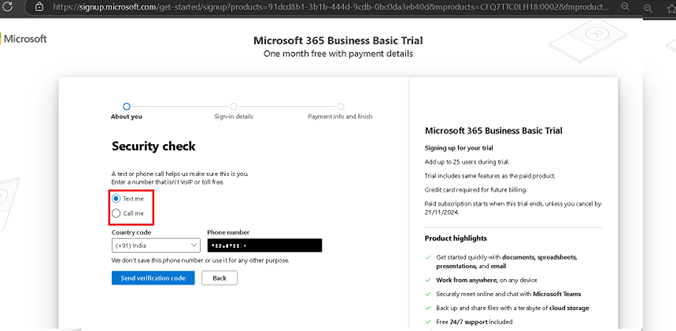
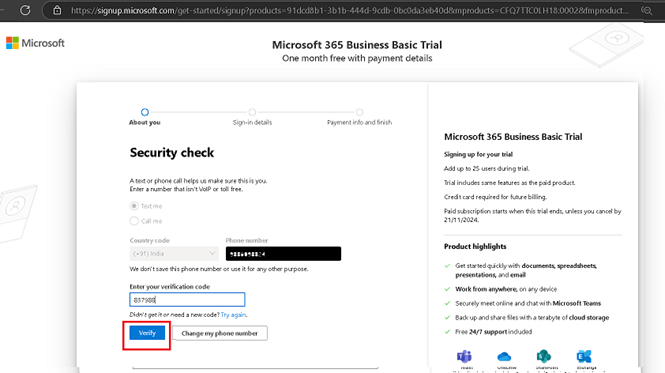
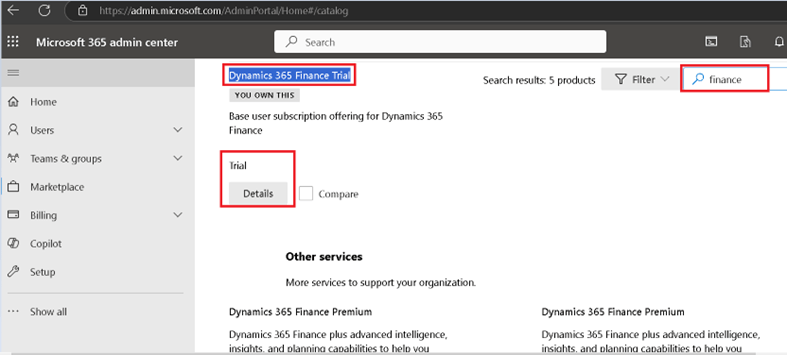
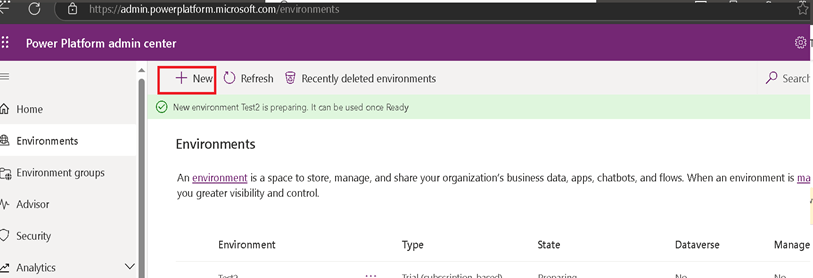
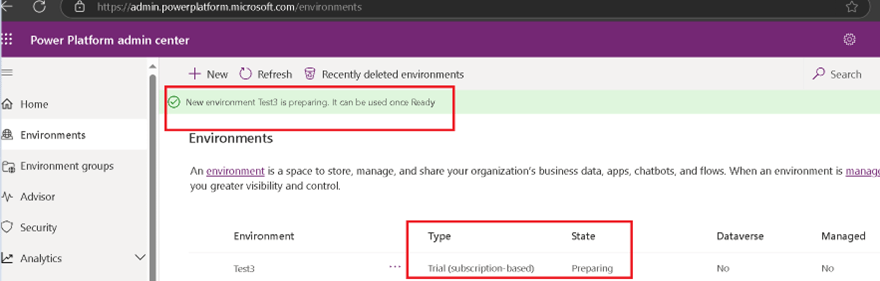
This document provides guidance for the creation of a free trial account for Office 365 and its subsequent utilization for the Dynamics 365 Finance and Operations trial for practice purposes.
Given license is subscription based and has validity for 30 days with very minimal charge and can be extended.
Office 365 account provides access to power platform and Microsoft admin center.
The general ledger is a collection of the group of accounts that supports the value items shown in the major financial statements. All transactions that have financial impact only need to be recorded in General ledger
This module includes:
Need for General Ledger.
What are Sub-ledgers?
How do Sub-ledgers provide data to General Ledger?
Need for General Ledger
The main purpose of a general ledger system is to record financial activity of a company and to produce financial and management reports to help stakeholders make decisions.
For any company that has large number of transactions, putting all the details in the general ledger is not feasible. Hence it needs be supported by one or more subsidiary ledgers that provide details for accounts in the general ledger.
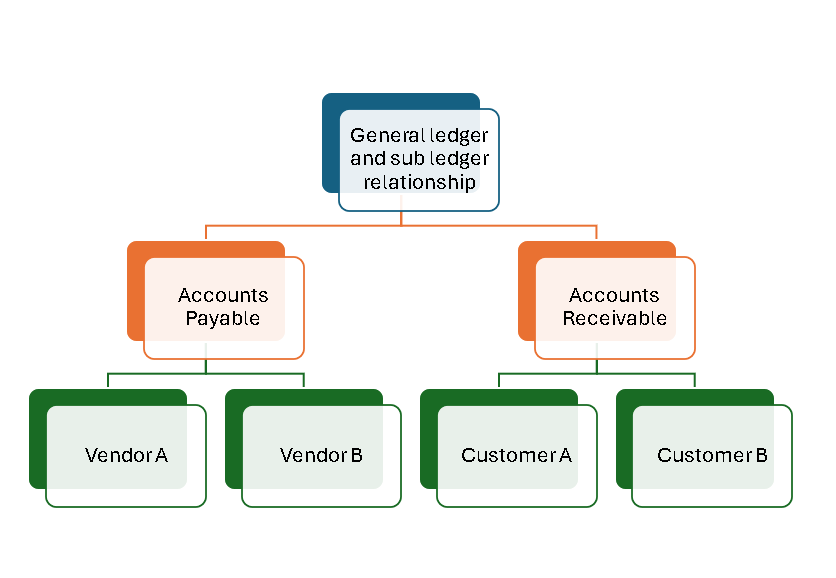
General Ledger Vs. Sub Ledger
A subsidiary ledger is a group of similar accounts whose combined balances equal the balance in a specific general ledger account.
Balances in General Ledger are often supported by various sub ledgers. Subsidiary Ledgers facilitate recording of complete financial and other information related to the transaction.
Example
If a company does not maintain the Sub Ledgers and keeps all the information in the General Ledger, imagine what will be the size of your General Ledger, if you have 8000 customer accounts, 4000 supplier accounts and, 2000 items you trade in. On an average you enter into 5000 different transactions with your suppliers and customers who are spread across the globe. Even company has multiple Fixed Assets and Banks accounts that needs subledger and ledger concept.
In the Fixed Assets Subsidiary Ledger you can find all the details pertaining to fixed assets owned by the company. Apart from the financial details like cost of the assets, other information like date of purchase, date when asset was put to use in business, name of the supplier and storage location etc. is also captured in subsidiary ledgers.
An accounts receivable (AR) subsidiary ledger includes a separate account for each customer who makes credit purchases. The combined balance of every account in this subsidiary ledger equals the balance of accounts receivable in the general ledger.
The combined balance of every account in this subsidiary ledger equals the balance of accounts receivable in the general ledger. Subsidiary ledgers contain supplemental accounts that provide the detail to support the balance in a control account. Subsidiary ledgers also capture details pertaining to financial transactions
The general ledger account that summarizes a subsidiary ledger’s account balances is called a Control Account or master account.
Accounting transactions are captured in General Ledger at a summarized level and all relevant details for that transaction are available in the subsidiary ledger
Best Practices
Primary basis for best practices is simplification in order to achieve an enhanced level of efficiency. The two best practices that follow this approach are.
Restructuring the general ledger to allow for the use of activity-based costing
All accrual entries are generally auto reversal entries. Validate the statement
Gain on sale of assets is nothing but the business income. Validate the statement
R2R is the heart of any accounting process. Functions like AP, AR,Payroll and T&E ultimately roll into R2R. Validate the statement
Human resources are treated as the resources of the business. If so, even these resources have to be shown in the Balance sheet. But in practice, they are not shown based on one accounting convention. Name the convention.
1. Difference between Provision and Reserves
2. Cash and accrual method of transaction meaning
3. Why Retained earnings account is required
4. Types of account and golden rules of it
5. Detailed explanation of General ledger and subsidiary ledger
6. Prepaid and accrual journal entries
7. What is tanglible and intangible assets
8. Depreciation on revaluation is done?
9.what is Impairment of assets?
10.What are the types of business transactions in accounting